Digital Periscope

Here are some details about our final project for Sensitive Buildings. Some more info to come soon.

Project by Michelle P Boisson, Kaitlin Till-Landry and Tak Cheung with tremendous help from Mark Breneman.

(currently this is how we’ve resolved our viewing apparatus for now.)

Our final group project for this class was to design something for the residential building at the corner of Columbus Circle, 240 Central Park South. We had unprecedented assess to the building thanks to the building’s owner(Jim) and manager(Peter). After a few visits to the building, which included the subbasement’s water heating to the tippy top of the roof, and meeting with a few residents we started to brainstorm possible interventions. One thing we were really impressed with was the vantage point on the roof. It over looked Central Park, Columbus Circle and surrounding canons of modern skyscrapers. We thought it was be a nice feature to provide this vantage point from the street level, making the building into a physical building periscope.

Our first challenge was connecting the viewfinder with the IP camera. We tried using Sean McIntyre’s and Deqing Sun’s wireless routers. We wanted to see if it was possible to link the IP cameras directly with the android tablet. There was no internet connection on the roof of this building and at first wiring seemed like a huge pain. We hit a lot of hurtles with networking and finally resorted to stringing a 150 foot CAT5 cable on the roof to the elevator room below.

We first picked a camera that would allow us to dynamically focus and move vantage points. At ITP we had several of these IP camera made by Axis so we borrowed one for this project.

The installation was a lot of fun, scary at times, since we had to climb to the tippy top of the building to install this camera.


Once we had the camera up, we could view it and control it remotely. Here’s a screen grab of us checking out the view.

Screen Recording of Roof Cam from Michelle Boisson on Vimeo.

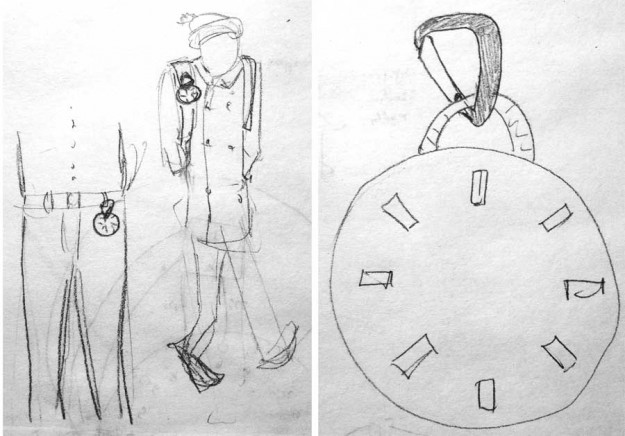
For the physical form of the viewing device we wanted to keep the aesthetics of a periscope but we knew we had to work within the space. At first we wanted to have this be an optional indoor/outdoor platform. We realized later it would suit the building better being only an indoor viewing device. Below is the viewing sculpture we were aiming to build. A memphis-styled geometric form where handles and turning dials are in place to interface with the IP camera.

Wearable digital compass progress

Following up on my midterm project, I wanted to make a wearable digital compass, that would point to a destination you give it, instead of pointing North. Here is the process I went through, the successes and the failures.

The Parts

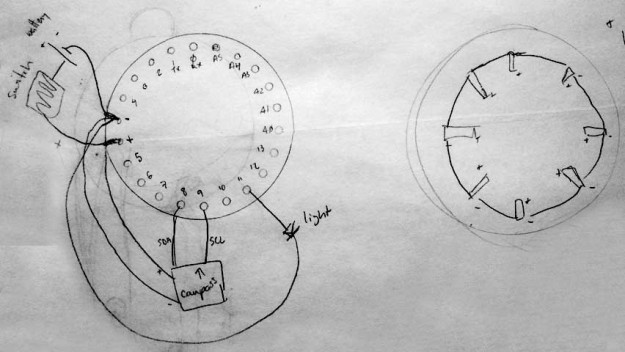
I ordered my parts from sparkfun. I got an ATtiny85 which I could program with the Arduino Uno, a compass module, and ripped some lights out of a children’s shoe (actually Bona did this part for her own project and donated the extra pink ones to me!). Eventually I thought this wearable would use bluetooth to communicate with a cellphone to get current GPS location and destination location, but I left this part out for this iteration. The locations will be hardcoded for now.

Testing the Compass Module

The module was actually fairly easy to setup. It has a breakout board and code posted on sparkfun. I used a variant of the code posted on bildr.org to get a simple circuit to point north. Here I’m using 4 lights instead of 8 like I did in the midterm.

Video: to be posted soon

Then I wrote a script so that it would take two points, where you are and where you want to go, (each with a latitude and longitude) and your heading from the compass, and point in the direction of your destination.

Programming the ATtiny85

I was pretty excited about this part. The ATtiny85 is pretty tiny so it seems it would be great for wearables. However, I soon realized that that the tiny was too tiny for my project, because I needed at least 6 pins (4 lights and 2 for the compass) and it only had 5. Plus some of the functions used by the compass module are not supported by the ATtiny. Doh!

But before I realized all this, I followed the tutorial at High-Low Tech and got my ATtiny to make a blinking light! Pretty cool huh?

Video: https://vimeo.com/55919894

The Wearable’s Shape Part 1: Clip-On Compass

At one point, I considered using a hard shelled bracelet, like a bangle, so that it could accomodate all the hardware. But that style was not at all in my vision, plus I would never wear a bangle, it’s just not me. My compass was more for someone who was on a hike, a bike ride, or an urban wandering walk. I wanted it to be a bit sporty, a bit rugged.

I designed a clip-on compass made of fabric, that you could clip to your bag or clothes.

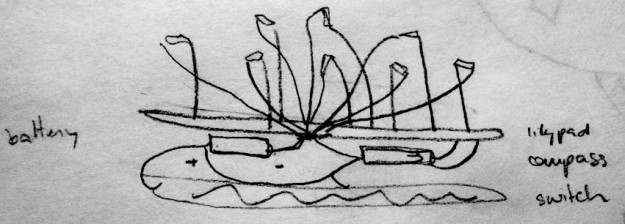
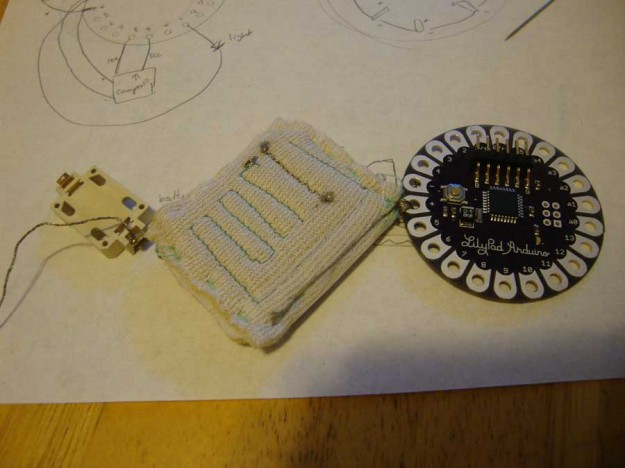
To make it compact, I thought I stack everything on top of each other…

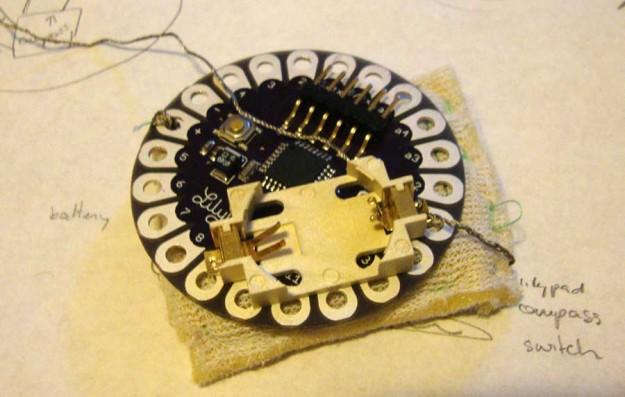
But as soon as I started sewing it, it became clear why that was a bad idea.

It was getting messy. I wouldn’t be able to control the thread from crossing and short-circuiting.

The Wearable’s Shape Part 2: Wristband

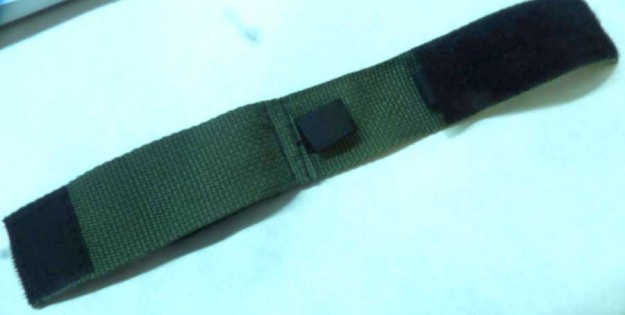
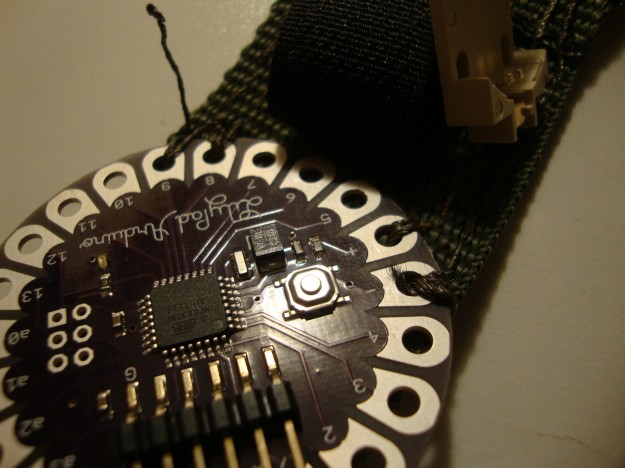
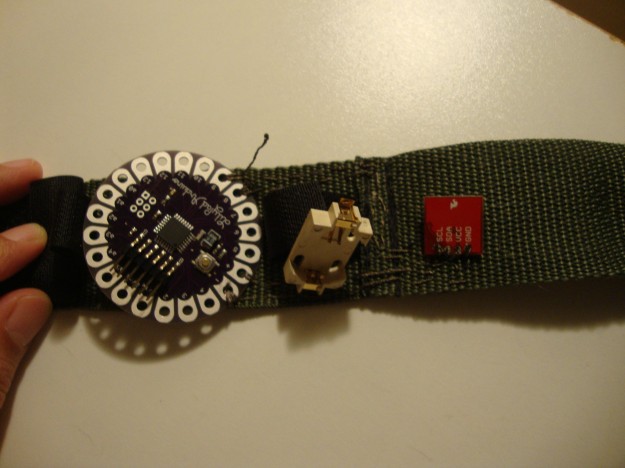
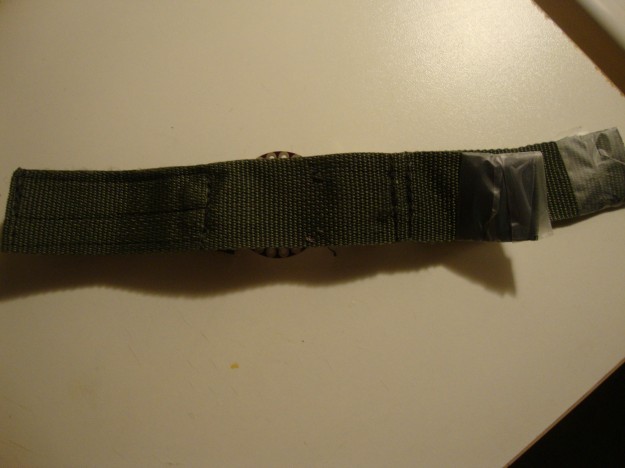
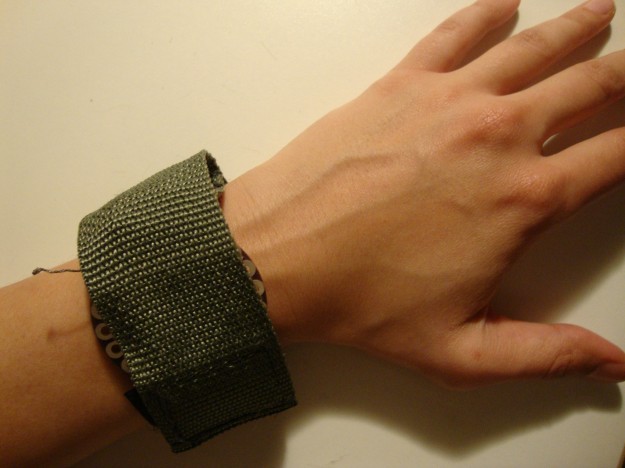
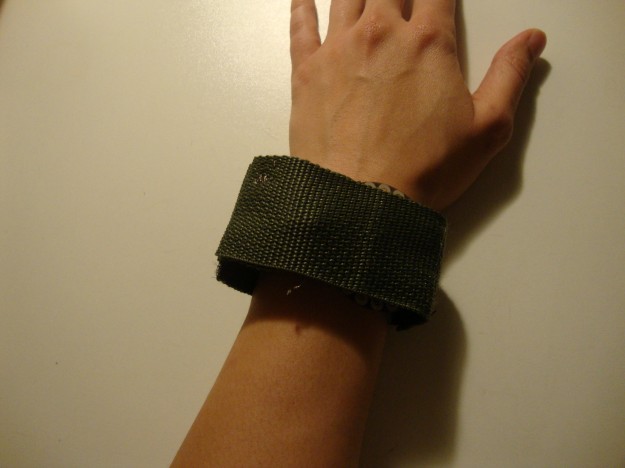
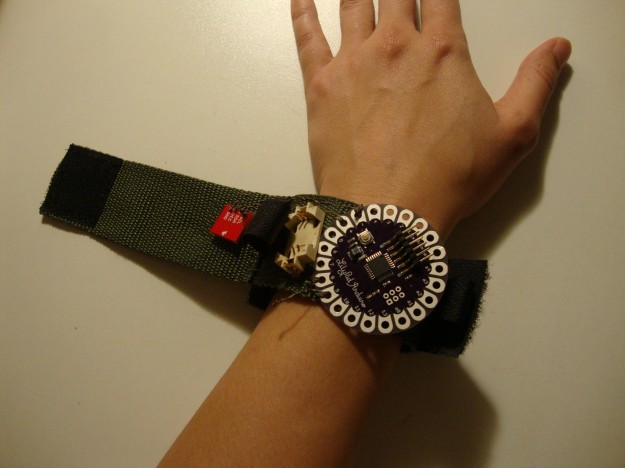
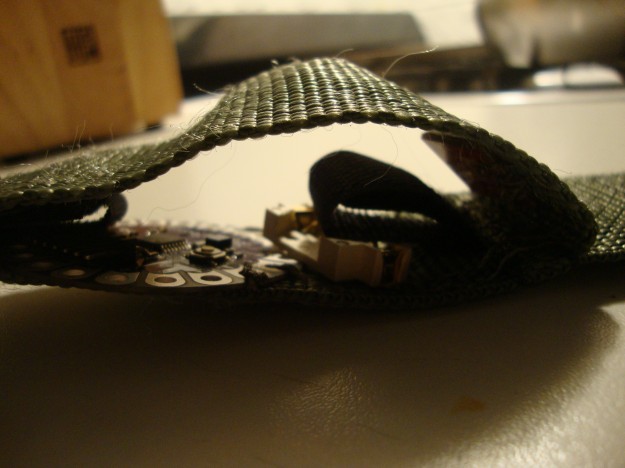
So I went back to my original idea of a wristband. I could spread out the hardware a bit more, than trying to stack them. I found this awesome armband at the Army/Navy story on 8th street between 5th and 6th avenue. It’s for service men and women to put their watch. It’s a little hard to see in the photo but it has velcro straps that go around your wrist, two smaller velcro straps inside to hold the watch face, and a velcro flap that folds over the face of the watch to protect it. This was much closer to the aesthetic I was originally thinking.

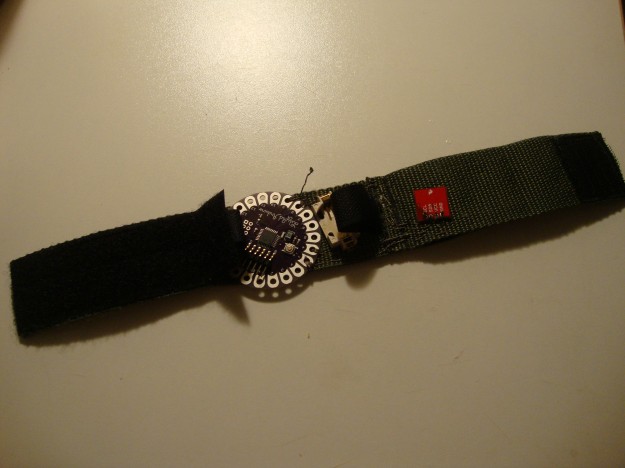
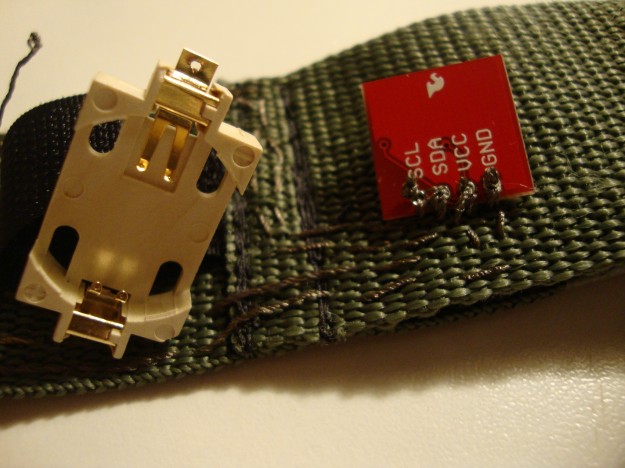
So I started to sew the compass in…

Unfortunately, this is as far as I got, because I can’t get a reading on the compass. I’m still debugging, but I’m guessing there are threads touching somewhere. I also need to solder, so that could be the issue too. But when it’s done, there will be lights on the top here:

Even if I got the sewn compass working, it’s not perfect. the lilypad is too wide for the wristband, but it would suffice for a prototype among prototypes.

I really want to continue this project and having it working. There are many more lessons to learn in this, including improving my sewing skills.

Lessons Learned the Hard Way

  1. The less hardware, the better! More hardware, makes it not so soft
  2. Stacking hardware to save space is a bad idea, especially if you don’t really know what you’re doing.
  3. Make sure your microcontroller has all the pins you need and supports your functions.
  4. You can try to plan out things in three dimensions forever. Just start making it so you can see where you fail and start remaking it sooner.
  5. Sewing a circuit is hard and time consuming, but will be easier with practice.
  6. The form is as important as the function, and deserves equal amount of time, planning, effort, stress, etc.

The Grameen Foundation Data Exploration

WorkJam moving storyboard

My video for WorkJam will be shot from the point of view of the computer itself, the uses workstation. We watch them go through a work session with and without WorkJam with freeze frame explanations of what’s going on.

Here’s a really, really rough first take (more like a movie storyboard) for the video. Here, I’m using my built-in my webcam and myself as an actor. But for the final, I will be reshooting this with a real camera and someone else acting.

WorkJam RoughCut2 from Michelle Boisson on Vimeo.

Edible Ciruits

Stop Motion Trial 1

WorkJam User Journey

Music plays in the rhythms of our world. It get us going.
From fight songs, to lovesick ballads, to chants of freedom and everything in between, music simultaneously keeps us company and brings people together. Our emotional attachment to music is known to change how we feel and how we approach tasks.
WorkJam harnesses these powers of music to help you get through your workday without being drained.
WorkJam listens to your energy levels and plays songs to keep you in the creative flow.

Many people play music while they are getting work donw. WorkJam’s smart song selection and sensor system responds to readings of your energy level through EEG. As work progresses and your energy starts to dip, WorkJam responds by playing incrementally faster-paced music. The energy in the music feeds your mental energy so you’re able to maintain a steady workflow. As your energy comes up, the music switches to a slower tempo and even ambient music or near silence, so you don’t get tired by the music itself.

When your energy is really slowing you down. It’s time to take a break, and you’re rewarded with one of your favorite songs. Sure to have you come back to work feeling refreshed and pumped. You can trigger one of these songs at any point to get an extra boost. Use your friend’s favorite songs as your own boosts too and grow your music collection.

WorkJam
Music for your workflow

Predicting the Future with R

Mapping Stop and Frisk Data

Where Stop and Frisks were happening during the month of November 2011

Colored by Race

Ethnography Observation

Last week, we learned about ethnographic research, another type of observation exercise which much more qualitative than quantitative. We were to find a subject, visit their home and learn about how they view themselves, how they curate and display the items in their home. Michael Uzzi, Manuela Donoso Llamas and I posed as artists looking to take cues from our subjects lifestyle to build an art piece. Here is the presentation of our findings.

Proudly powered by WordPress
Theme: Esquire by Matthew Buchanan.