Interactive Jellyfish Light Sculpture

Overview

Our lighting sculpture evolved into a jellyfish inspired interactive sculpture that emits lights and is able to hear and speak like a living organism. When people get closer, her heart starts beating and she emits light and makes sounds in her own language. As she is from the deep sea, we don’t exactly know what she is saying, but she wants to communicate with people.

The lighting sculpture is constructed from laser-cut acrylic and a matrix of 12v. LEDs that are soldered together in a way that allows each LED to be controlled individually. The sculpture also has range finder that senses when an object or person is close, and speakers. Continue reading

Media Controller in Progress

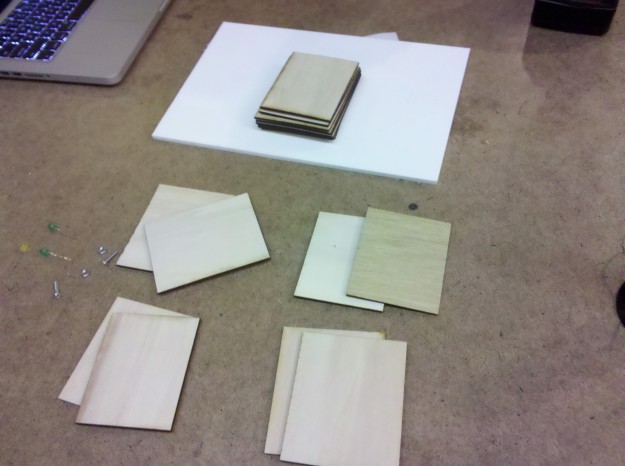
Clair, Hyeyoung and I started ironing out details and prototyping our media controller, the interactive chandelier. Here we built a wooden prototype and tested the lights strips.

Continue reading

Strength-o-meter with Arduino and LEDs

There are 5 red LEDs that light up progressively and one by one as you press on the sensor. Here is the code but it is not working as expected. They don’t dim or turn off when you let go. I think I need to nest the if-statements. I need to keep working on this.

int pressureVal = 0;
int mappedVal;
float voltageIn =0;

const int ledPin = 9; // pin that the LED is attached to
const int ledPin2 = 10;
const int ledPin3 = 11;
const int ledPin4 = 6;
const int ledPin5 = 5;

void setup(){
//this opens a debug window, that speaks at 96bits per second
Serial.begin(9600);
pinMode(ledPin, OUTPUT);
pinMode(ledPin2, OUTPUT);
pinMode(ledPin3, OUTPUT);
pinMode(ledPin4, OUTPUT);
pinMode(ledPin5, OUTPUT);
}

void loop(){
pressureVal = analogRead(0);

Serial.print("\n Potentiometer Value = ");
Serial.print(pressureVal);

// goes from 1023 to 0
// we can set mapped values so they mean more to us
mappedVal = map(pressureVal,0, 1023,0, 255);
Serial.print("\n Mapped Value = ");
Serial.print(mappedVal);

//reset the RDC, good practice, 10 ms
delay(10);

if (mappedVal > 255 / 5){
analogWrite(ledPin, mappedVal);
}
if ( mappedVal > 255 * 2/5 ){
analogWrite(ledPin2, mappedVal);
}
if ( mappedVal > 255 * 3/5 ){
analogWrite(ledPin3, mappedVal);
}
if ( mappedVal > 255 * 4/5 ){
analogWrite(ledPin4, mappedVal);
}
if ( mappedVal == 255 ){
analogWrite(ledPin5, mappedVal);
}
}
Analog Input with Arduino (P Comp Lab)


This is the lab using analog inputs. I used a potentiometer to control the brightness of the LED.

Here’s the code:
const int ledPin = 9; // pin that the LED is attached to
int analogValue = 0; // value read from the pot
int brightness = 0; // PWM pin that the LED is on.

void setup(){
pinMode(ledPin, OUTPUT);
Serial.begin(9600);
}

void loop(){
//read analog value
analogValue = analogRead(A0);
brightness = analogValue / 4;
analogWrite(ledPin, brightness);
Serial.print(analogValue + "/n");
}

Selfish Teddy

Teddy love his stuffed elephant Paco and he feels very possessive about him. He hates to share. If you take Paco away, watch out!

Here’s the code that produced this:

const int buttonPin = 2; // the number of the pushbutton pin
const int ledRightEye = 9; // the number of the LED pins
const int ledLeftEye = 10;
int brightness = 0; // how bright the LED is
int fadeAmount = 5; // how many points to fade the LED by
int buttonState; // variable for reading the pushbutton status

void setup() {
pinMode(ledRightEye, OUTPUT);
pinMode(ledLeftEye, OUTPUT);
pinMode(buttonPin, INPUT);
}

void loop() {
// read the state of the pushbutton value:
buttonState = digitalRead(buttonPin);

if (buttonState == HIGH) {
// set the brightness of the pins:
analogWrite(ledRightEye, brightness);
analogWrite(ledLeftEye, brightness);

// change the brightness for next time through the loop:
brightness = brightness + fadeAmount;

// reverse the direction of the fading at the ends of the fade:
if (brightness == 0 || brightness == 255) {
fadeAmount = -fadeAmount ;
}
// wait for 30 milliseconds to see the dimming effect
delay(3);
}else{
analogWrite(ledRightEye, 0);
analogWrite(ledLeftEye, 0);
}
}

But before I could even get to that I had to figure out a few things. Continue reading

Proudly powered by WordPress
Theme: Esquire by Matthew Buchanan.