Interactive Jellyfish Light Sculpture

Overview

Our lighting sculpture evolved into a jellyfish inspired interactive sculpture that emits lights and is able to hear and speak like a living organism. When people get closer, her heart starts beating and she emits light and makes sounds in her own language. As she is from the deep sea, we don’t exactly know what she is saying, but she wants to communicate with people.

The lighting sculpture is constructed from laser-cut acrylic and a matrix of 12v. LEDs that are soldered together in a way that allows each LED to be controlled individually. The sculpture also has range finder that senses when an object or person is close, and speakers. Continue reading

Pedal-Powered Brake Lights: Process

Here’s a rough video about the journey, creating my bicycle brake lights, powered by pedaling:

Pedal-Powered Bicycle Brake Lights: Test Ride and New Parts

Since presenting my progress on Wednesday, I received the geared-motors and wheels in the mail and they are awesome! Continue reading

Pedal-Powered Brake Lights: Update

So after speaking with Alex I had changed my project to be a pedal-powered Arduino. The idea was exciting. It would still be a pedal-powered brake light but through a microcontroller. I did some research on what that would entail and I didn’t find much. I would need to regulate the power and also make sure it doesn’t go above 5v and fry the Arduino. Alex suggested I contact Jeff Feddersen. He teaches Sustainable Energy at ITP which is the class that Alex’s project was for. Apparently in class he demonstrated a hand-cranked Arduino.

So I emailed Jeff, but I haven’t gotten a response. In the meantime, I found these images from his class that might be what I need.
http://itp.nyu.edu/sustainability/energy/images/class3/5V.jpg
http://itp.nyu.edu/sustainability/energy/images/class3/5Vschem.jpg

So.. Back to my Original Idea

But in the interest of time–this final is due in nearly a week–I decided to go back to the drawing board, do less drawing on the board, and just try stuff.

Again, these are the 3 things I need to accomplish:

  1. I need to activate the light when I brake (create a switch)
  2. I need to generate power from the motion of the bike, by pedaling
  3. The product itself must be unobtrusive to the experience of pedaling and braking

Continue reading

Pedal-Powered Brake Lights Progress: change in direction

Talking to Alex, from the recyclelight.me project, was immensely helpful. We brainstormed ideas on how to generate power and activate a switch on the brakes. He was encouraging, but also felt that power generation wasn’t necessary for the project and asked me to think about using batteries instead.

I’d rather not, but doing both switching on the light and generating powere were going to be more difficult than I thought.  So my new idea is to constantly generate power from the pedaling motion of the bike, and use that power  to power an Arduino to which I can hook up sensors, switches and lights. It’ll be a smart bike.

I’m using this tutorial as a basis for creating the generator:
http://www.instructables.com/id/Bike-Dynamo/?ALLSTEPS

I will need to figure out how to regulate the power for the arduino.

Pedal-Powered Brake Lights Progress: Dissecting a hand light

There are three things I need to accomplish with this project.

  1. I need to generate power from the motion of the bike, by pedaling
  2. I need to activate the light when I brake
  3. The product itself must be unobtrusive to the experience of pedaling and braking

The previous ITP project does these three things really nicely. By attaching the motors to the brake mechanism itself, they only generate power when the lights are needed, ie while braking.

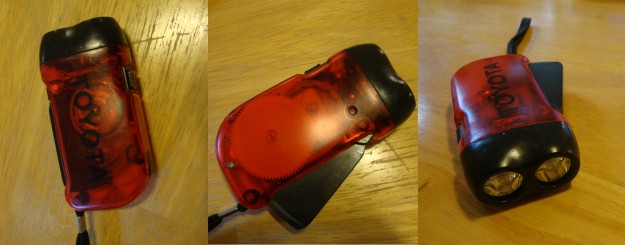
My original thoughts on this was for the activation to happen via the motion of pulling on the brake. I got inspired by a hand flashlight I had lying around the apartment that didn’t use any batteries. I decided to dissect it for ideas and information.

Continue reading

Final Project Proposal: Petal-Powered Bicycle Brake Lights

I always wondered why our bike lights weren’t powered by the cycling of a bicycle itself. In addition to that, I’ve always wanted my back light to turn on as I braked. This is the challenge that I’ve set up for myself for my Physical Computing final. Continue reading

Media Controller in Progress

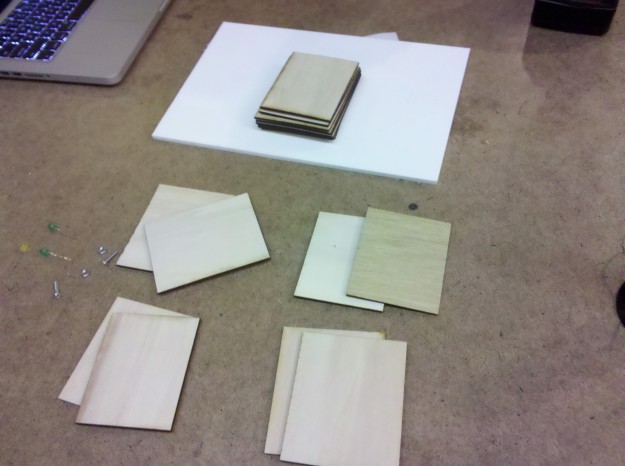
Clair, Hyeyoung and I started ironing out details and prototyping our media controller, the interactive chandelier. Here we built a wooden prototype and tested the lights strips.

Continue reading

Media Controller – Chandelier Specs

Hyeyoung Yoon, Claire Mitchell and I are working on building a media controller for Physical Computing.

After much discussion, settled on an idea of a chandelier that will light up when people sit at the dinner table. The user is controlling the lights by sitting down. The more people that sit at the table, the  brighter the room will be.

The Setup
Their will be 3-4 chairs at the table, and each will be fitted with pressure sensors. So when the person sits, the lights that are facing them will turn on.
This is assuming that the chandelier will not move (spin). Otherwise it will not work.
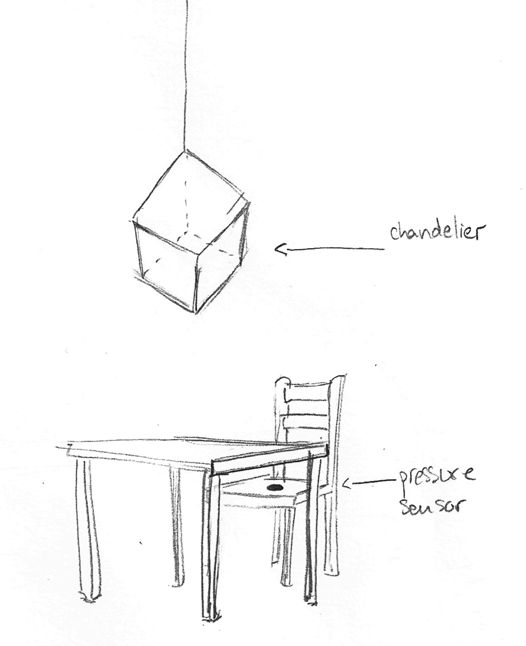
The Setup Showing One Chair

The chandelier itself is a 12 cubic inch, 6-sided cube made of transparent acrylic façades. Each façade has a duel layer of acrylic. The first layer, is cut into 9 3×3 squares that are linked via wire. The back layer is a  solid 12×12 in square. The back layer holds the white LEDs.
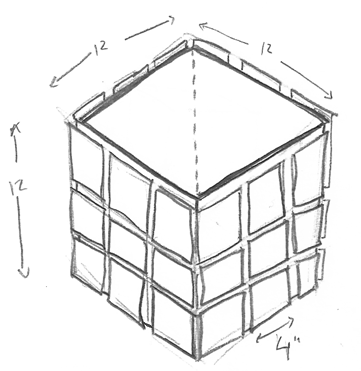
Chandelier Closeup
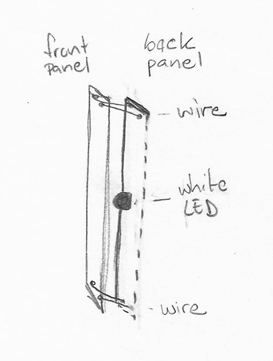
Chandelier Panel Detail

The Interaction

As one person sits down they activate a pressure sensor on the seat which lights up one side of the chandelier, the side facing them.

3-4 of the panels will have lights on them. Each of those panels of lights will be connected to a digital output on the arduino.

In pseudo-code, it will look something like this:

if (pressureSensor1 > treashold){
pinMode(panel1, HIGH);
}else{
pinMode(panel1, LOW);
}

if (pressureSensor2 > treashold){
pinMode(panel2, HIGH);
}else{
pinMode(panel2, LOW);
}

if (pressureSensor3 > treashold){
pinMode(panel3, HIGH);
}else{
pinMode(panel3, LOW);
}

if (pressureSensor4 > treashold){
pinMode(panel4, HIGH);
}else{
pinMode(panel4, LOW);
}
Stupid Pet Trick: I box, you box

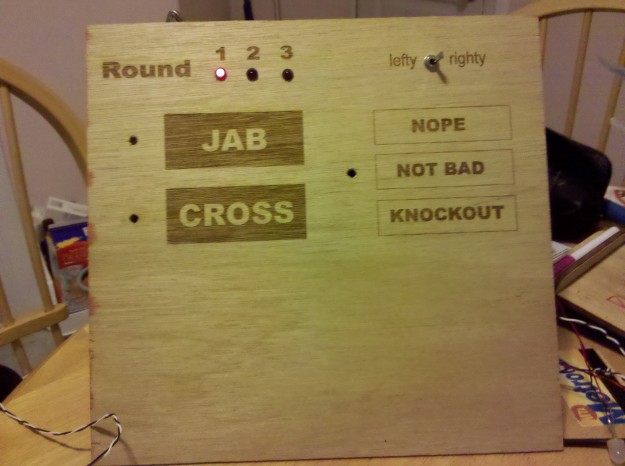
So I had this grandiose plan for building a boxing trainer. It had different rounds, it had a switch for lefty and righty configuration, it split out random combinations, and then could tell if you entered the combination correctly.

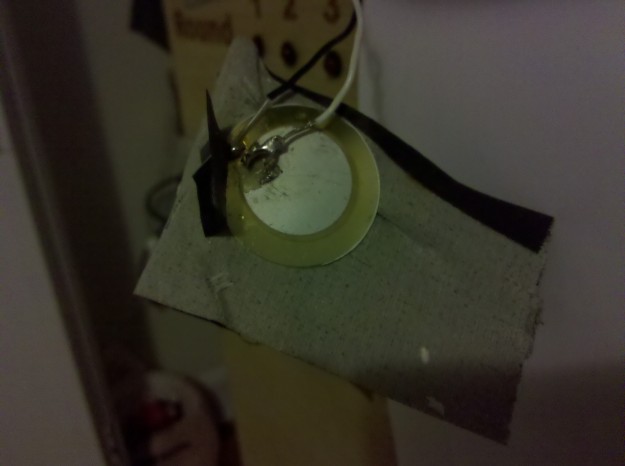
I ran into a lot of bumps along the road of this project. The biggest one was working with the piezos themselves. They are so delicate that the legs broke off nearly right after purchasing them. And soldering those suckers was a pain in the arse! I think half the time I spent on this project was either soldering the peizos or fiddling with them when on of the legs broke off.

I was also nervous about physically building an interface. I was in the shop when I noticed a lot of students using the laser cutter, so I drew up a simple interface reflecting my grand dreams of the project and had it etched on a piece of wood I found in the unclaimed scraps.

I began with a small circuit: 2 analog sensors (what i  had with me at home at the time; pressure sensor and on piezo), and 1 LED. From there I started badding more LEDs: 3 red ones for the rounds and a bigger blue and green ones to represent each punch.

Then i dove straight into the programming logic and things got a little complicated. I found that though i would hit the sensor once I would get several “knocks!” over the threshold I set and Arduino would understand it as 2 punches. To get around this, I delayed the program for one millisecond and that seemed to work.

While I ultimately wanted the arduino to show a random combination of varying lengths for each round, I started out with a fixed combination for each. Then to test if the user inputted the same combinationi used nested if-statements. That didn’t really work.

I met with our instructor Scott during office hours. I wished I was a bit more prepared and organized with specific questions. I felt like i had most of the pieces but things hadn’t really come together. Just talked it out with him was really helpful. His advice: start small, get one thing at time working, then build on top of that.

I took his advise, went home and started over. By starting over I was able to figure out how to save a sequence of punches to an array. And that’s how I ended up with this little, “stupid” application.

You punch a combination and it’ll show it back to you. That’s it. There are still three rounds. Round one will wait until you input 3 punches; round two, 4 punches; and round three 5 punches.

Proudly powered by WordPress
Theme: Esquire by Matthew Buchanan.